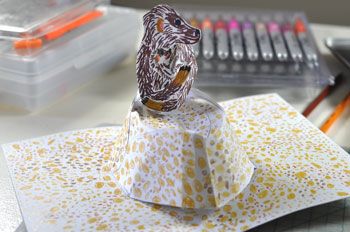
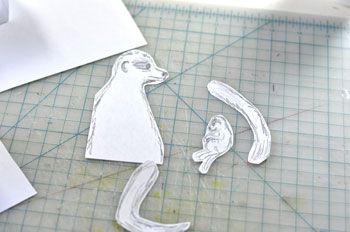
The idea is for a meerkat mommy holding her baby to pop up from a hole.
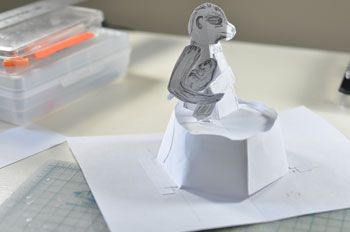
There are a couple of approaches to this that come to mind. One approach would be to build the meerkat directly onto the page, making the flat page the level of the hole, the ground flat. In that case, the hole would be drawn onto the background of the card. That is such a cop out. Please. Any decent meerkat-dwelling hole would have a ridge around it, wouldn't it? That's the point of this whole thing, to make it appear as if the meerkat is emerging from an actual hole, therefore, the hole is to be built up. Like a volcano in miniature. The meerkat will be an assembly positioned on top of a table inside the volcano-like cone. It will be a two-tier table, the lower tier forcing a bulge to the cone and preventing it from forming a point, which is the inclination due to it having been folded flat. We want to use the edges of the hidden lower table inside the mound cone to warp the skirt in order to diminish that tendency to point. Clever, eh? The meerkat never actually disappears entirely inside the cone, although it would be possible to construct such a pop-up, rather, this one simply gives the impression of popping out and that's good enough for me.
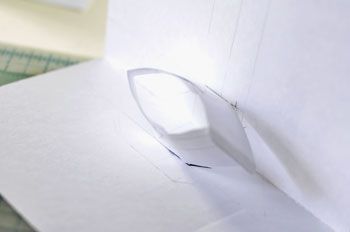
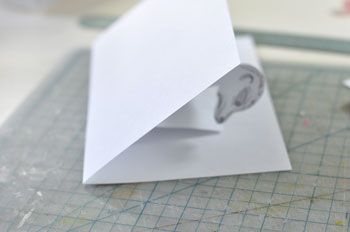
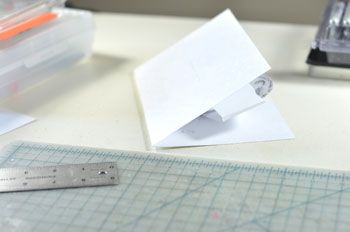
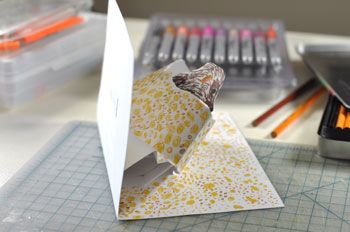
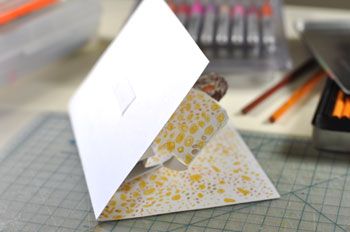
First I must see if a cone can be formed and if it will fold flatly, within which all the mechanisms will be positioned. It does work. It also gives me an idea of the sizes of the pieces needed. That trial is separate and set aside.
You'll notice:
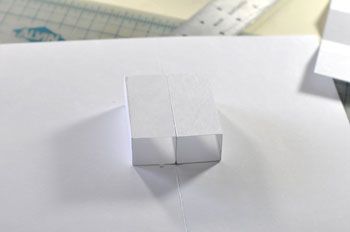
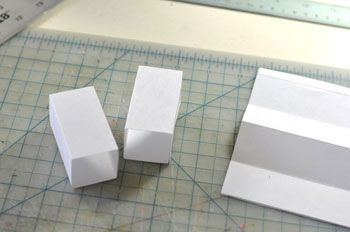
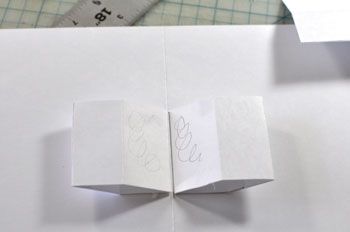
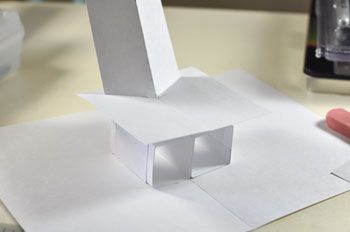
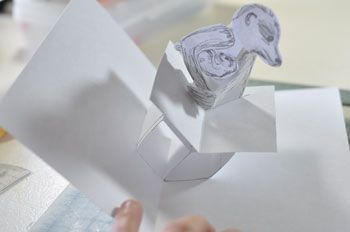
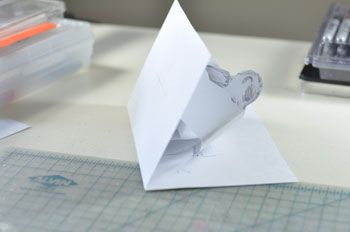
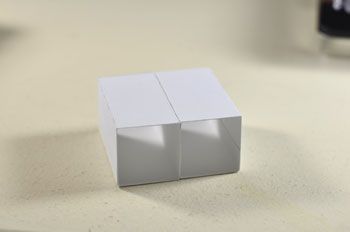
The table is constructed differently from an ordinary table which is actually kind of wobbly. Two boxes are used, or squared tubes, aligned with the card's central fold rather than three parallel I-beams. It's more simple this way and just as righteous.
Did I just now say righteous? I meant to say, it's easier and works just as well, possibly even better.
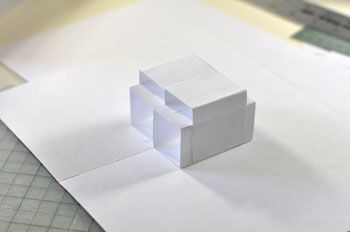
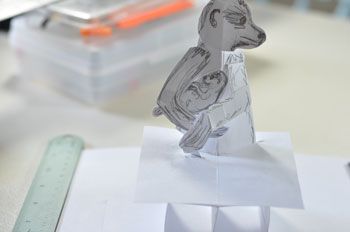
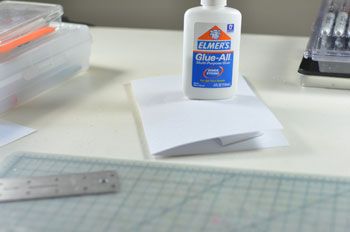
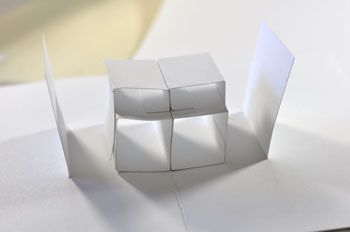
The two boxes are glued along the central fold simultaneously and in their folded position. As it happens, they haven't been glued together yet. That was an oversight. Their top surface provides a new surface, a plane parallel with the opened card and with a central fold directly above the central fold of the card. Another mechanism can be built upon this plane, in this case another table with another surface that is adjustable to the dimensions of the cone, whatever that turns out to be. It acts the same as a miniature card, forced in harmony with the outer card. The idea is it have a table on top of a table, the lower one forcing the shape of the cone skirt, the upper one holding the meerkat mechanism. This whole arrangement can be done differently. It's just the manner I decided on. I could have put the meerkat directly on the first table, or directly on the card, for that matter.
The two boxes are glued together. Scribbles show where the glue goes. Reinforcement, you see. This creates a central spine built up above the card's central fold. It's all very straightforward. No fancy angles that do insane mysterious things.
A new slightly smaller table is added to the first table. This new table will have yet another top added to it. The new top will be the bottom of the mechanism holding the meerkat mommy. That mechanism's bottom will be trimmed to fit the size of the upper portion of the cone, which at this point is unknown. And if not trimmed, then built out to reach the edges. This is the idea behind doing a prototype -- to see what happens.
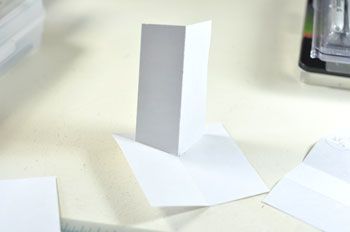
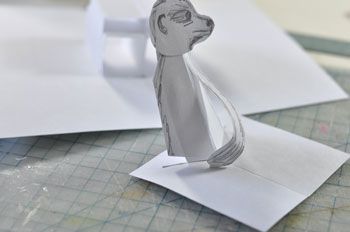
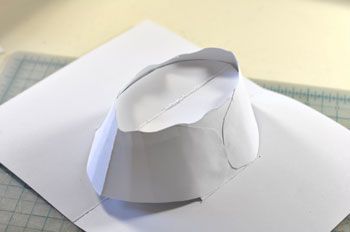
A new piece of card stock is scored and positioned on top of the tables to get an idea of the dimensions of the mechanism as it fits inside the card. I'm not interested here in taking measurements, I am interested in what will fit inside the folded card and inside the cone when it's finally attached. Mustn't be too wide, mustn't be too tall. If my paper is too tall, and I can fiddle around and see that now, then I'll chop off the paper and limit the meerkat to the trimmed size. This avoids the maths, which aren't all that reliable in the world of pop-ups anyway. It's folded paper we're dealing with here, not points in the precision of conceptualized space. I believe this is where I part company with my compatriots that I'm imagining put faith in measurements and in the beauty of mathematics. That is not how I understand things. For example, it is not important to me that the angle of the point on the pop-up pillar that is to hold the image of a meerkat be exactly 15˚. It could be 20˚ or 25˚ for all I care. Or anything in between any imprecise angle at all that works. What is important is for the meerkat to appear to be nearly straight up when the card is opened, and tucked when the card is closed. It's also vital for the angle of the cuts into the base to be identical on both sides. It doesn't matter what that angle is, just so they're identical. I can do that more easily by folding the card and making both cuts at once than I can by measuring both sides and cutting separately. I recommend it. The whole approach makes life so much easier. I suppose, in this manner we intuit our maths.
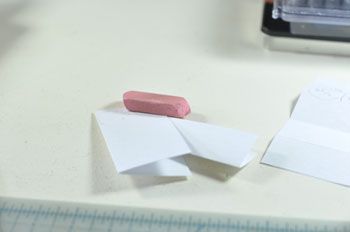
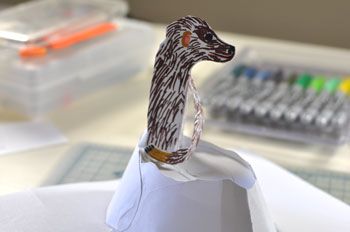
The arm holding the baby is attached to the base in front of the body at the same angle as the pillar holding the meerkat body. I know where the hand goes and I know where the shoulder goes, but I have no idea how the ulna and the tibia/fibula and elbow arrangement will go. I attach the hand with a hinge. The arm does not fold right. I cut off the hand to see what the arm must do to fold acceptably. Nothing seems to work. I detach the hand and abandon the hinge idea. I contrive a new connection that is more flexible than a hinge, a tab that runs through a slot and can swivel.

The tab is inserted up through the slot. the severed hand is attached to the top of the tab. The shoulder - elbow stub is hinged at the shoulder. The card is folded, I peek through the partially folded card to see what's going on inside and determine what's necessary to connect elbow which is now fixed to the hand which has a little leeway. I'm not certain anything will work. It appears, with a little jiggling around that tibia/fibula connection can hinge to the hand. It works. Thus the severed arm was tabbed at the bottom of the hand, hinged at the top of the hand and with the elbow and another hinge at the shoulder, the ulna/fibula elbow area was reconstructed. Finally, meerkat fur was drawn on the new parts. It all folds up precisely and stretches stretches back perfectly. Behold, the marvel that is paper!
The second arm is attached. The baby meerkat is moved around to see which arm is best to have it glued. It too must fold properly with nothing sticking out.


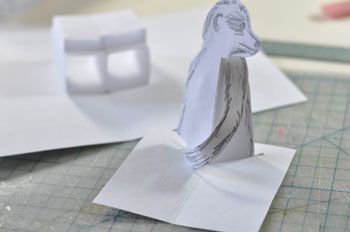


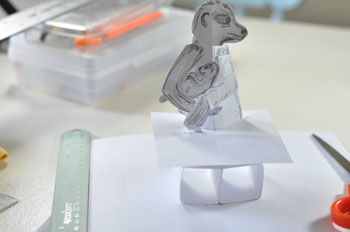

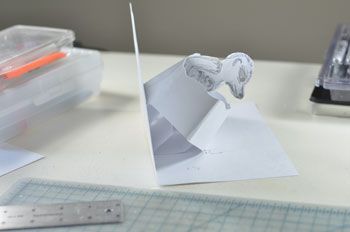

There you have it. This completes the prototype for the Meerkat mommy pops out of a hole pop-up card.
You know, I could use this for the final deal if I wanted to even though it's on 110 LB card stock and not 157 LB Bristol paper. And even though the top outer edge is cut 1/4 inch too short by mistake. Doesn't matter anyway because the pages will be glued together. It wouldn't be that horrible of a negligence and I doubt anybody would even notice, far less care. I doubt the recipients possess the tactile sensitivity to discern the difference, on this I could be wrong. But I do have my principles ya know, and I have a feeling this card is going to be kept around for a very long while. And besides, I'm not nearly burnt out on this project. I still have a few more pages to go. Just stick with me and see if I can replicate this although I doubt I can improve on it much.


No comments:
Post a Comment